Delightful Pear Tart for Home Cooks
Ingredients
Method
- Preheat the oven to 375°F (190°C).
- Prepare the pie crust in a tart pan.
- Combine sliced pears with sugar, lemon juice, flour, cinnamon, and salt in a mixing bowl.
- Arrange the pear mixture in the tart crust.
- Brush the crust with beaten egg.
- Bake in the preheated oven for 35-40 minutes.
- Let the tart cool for 10-15 minutes before serving.
Tried this recipe?
Let us know how it was!Introduction
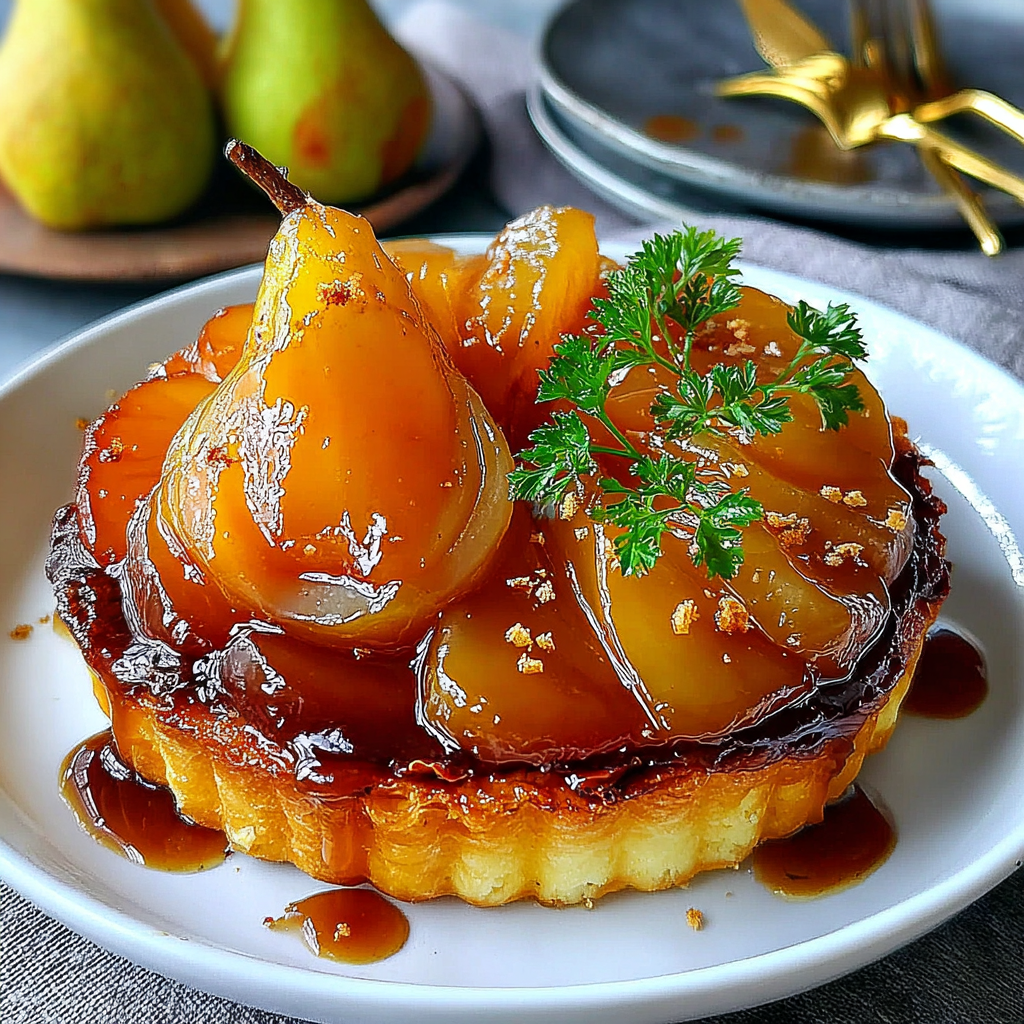
A pear tart can be the perfect dessert to impress your family and friends, celebrating the subtle sweetness and unique texture of fresh pears. This easy recipe brings together a flaky crust and a deliciously warm pear filling, making it a wonderful choice for gatherings or a cozy evening at home.
What makes this tart so appealing is not only its flavor but also its simplicity. With just a handful of ingredients and straightforward techniques, you can create a dessert that feels luxurious without spending hours in the kitchen. Let’s dive into the delightful world of pear tarts and explore how you can make one that's sure to please.
Ingredients
- 1 pre-made pie crust
Using a pre-made pie crust saves time and ensures a consistent texture. This buttery base holds the pear filling well and has a crispiness that complements the soft fruit beautifully. - 4 ripe pears, thinly sliced
Pears provide natural sweetness and a juicy texture to the tart. Choosing ripe pears ensures they maintain their shape while baking, giving you a tender filling that's packed with flavor. - 1/2 cup sugar
Sugar not only adds sweetness but also helps to caramelize the pears during baking, enhancing their natural flavors. This balance is essential for achieving a rich and pleasing taste. - 2 tablespoons lemon juice
Lemon juice brightens the flavor of the pear filling and balances its sweetness. It also prevents the pears from browning, ensuring your tart looks as good as it tastes. - 1 tablespoon all-purpose flour
Flour helps to absorb excess moisture from the pears as they bake, preventing the tart from becoming soggy. A small amount is sufficient to keep the filling perfectly luscious. - 1 teaspoon ground cinnamon
Cinnamon adds warmth and depth to the tart's flavor profile. It complements the sweetness of the pears beautifully and evokes a cozy feel, perfect for a comforting dessert. - 1/4 teaspoon salt
A pinch of salt enhances all the other flavors in the tart, balancing out the sweetness and bringing the dish to life. Salt is crucial even in sweet recipes to create a harmonious taste. - 1 egg, beaten (for egg wash)
An egg wash gives the crust a beautiful golden color after baking, making the tart more visually appealing. This glossy finish is a surefire way to entice your guests.
Directions & Preparation
Step 1: Preheat the oven to 375°F (190°C).
Preheating your oven is crucial for achieving the perfect bake. This ensures that the pie crust starts to cook as soon as it's placed in the oven, resulting in a flaky and crispy texture that pairs well with the filling.
Step 2: Prepare the pie crust in a tart pan.
Gently press the pre-made pie crust into the tart pan, ensuring it covers the bottom and sides evenly. This forms the foundation of your tart, providing structure and support to the sweet filling, which will bake beautifully in its embrace.
Step 3: Combine sliced pears with sugar, lemon juice, flour, cinnamon, and salt in a mixing bowl.
By mixing the pears with sugar, flour, and spices, you allow the flavors to meld together, enhancing the pear's natural sweetness. The flour will help thicken the juices released during baking, ensuring the filling has the right consistency.
Step 4: Arrange the pear mixture in the tart crust.
Carefully layer the pear mixture into the tart crust, making sure to distribute the pears evenly. This presentation not only looks appealing but also ensures that each slice of the tart includes a balanced amount of filling and crust.
Step 5: Brush the crust with beaten egg.
Applying an egg wash to the crust before baking will give it a lovely golden hue, enhancing its visual appeal. This small step makes a significant difference in how your tart looks when served, enticing everyone at the table.
Step 6: Bake in the preheated oven for 35-40 minutes.
Baking the tart at the correct temperature allows the crust to become flaky and the pears to soften. Keep an eye on the tart; it should be golden brown and bubbling when it’s done. If the crust edges darken too quickly, cover them with foil.
Step 7: Let the tart cool for 10-15 minutes before serving.
Cooling the tart slightly allows the filling to set, making it easier to slice. While the aroma will be tempting, letting it rest ensures that the slices hold their shape, providing a better presentation and easier serving.

Choosing the Right Pears
For the best flavor in your pear tart, opt for varieties like Bartlett or Anjou. Both offer a sweet and juicy profile that holds up beautifully when baked. Always select ripe pears for optimal sweetness; they will soften as they bake, creating a luscious filling that’s bursting with flavor.
Enhancing Flavor with Spices
While cinnamon is a classic choice, feel free to experiment with other spices like nutmeg or ginger to tailor the flavor of your pear tart. A hint of nutmeg adds warmth and complexity, while ginger introduces a refreshing heat. Customizing your spices allows you to create a tart that reflects your unique taste preferences.
Serving Suggestions
Pair your pear tart with a scoop of vanilla ice cream or a dollop of fresh whipped cream for a delightful contrast in texture. Consider drizzling caramel sauce or honey over the top to elevate the presentation and flavor, creating an indulgent treat that will leave your guests raving.
FAQs
What if my pear tart filling is too thin?
If your filling turns out too thin, it’s likely due to excess moisture from the pears. You can adjust by mixing in a bit more flour next time or using a drier pear variety.
Can I use different fruits in this tart?
Absolutely! This recipe is versatile. Try using apples or a mix of seasonal fruits to give a refreshing twist to your tart while maintaining the basic preparation method.
Why does my crust become soggy?
Soggy crusts often result from overfilling or not pre-baking the crust slightly. Ensure you allow some space for juices to collect and consider blind baking the crust for a few minutes before adding the filling.
How can I tell when the tart is done baking?
Your tart is ready when the crust is golden brown, and the filling is bubbling. If you notice the edges of the crust browning too quickly, cover with foil to prevent burning.
What if I want to sweeten it more?
If you prefer a sweeter tart, you can increase the sugar slightly, or serve with sweet toppings like whipped cream or vanilla ice cream, balancing the overall sweetness while enhancing flavor.
Why is my tart filling bland?
A bland filling may result from under-seasoning. Ensure you incorporate enough sugar and spices to bring out the pears’ natural sweetness. Tasting the mixture before baking can help you adjust.
Conclusion
Creating a pear tart is a rewarding experience that brings a touch of sophistication to your baking repertoire. With this clear, straightforward recipe, you can impress your loved ones with a delightful dessert that showcases the lovely flavors of fresh pears.
Enjoy the process of baking, and remember that each step contributes to the final outcome. With practice, you'll soon feel confident enough to experiment with variations and create your own signature pear tart.
Recipe Card
Delightful Pear Tart for Home Cooks
Ingredients
Method
- Preheat the oven to 375°F (190°C).
- Prepare the pie crust in a tart pan.
- Combine sliced pears with sugar, lemon juice, flour, cinnamon, and salt in a mixing bowl.
- Arrange the pear mixture in the tart crust.
- Brush the crust with beaten egg.
- Bake in the preheated oven for 35-40 minutes.
- Let the tart cool for 10-15 minutes before serving.
Tried this recipe?
Let us know how it was!Notes
Additional serving suggestions: pair with a crisp salad, garlic bread, or roasted seasonal vegetables for balance.
For make-ahead, prep components separately and assemble just before heating to preserve texture.
Taste and adjust with acid (lemon/vinegar) and salt right at the end to wake up flavors.