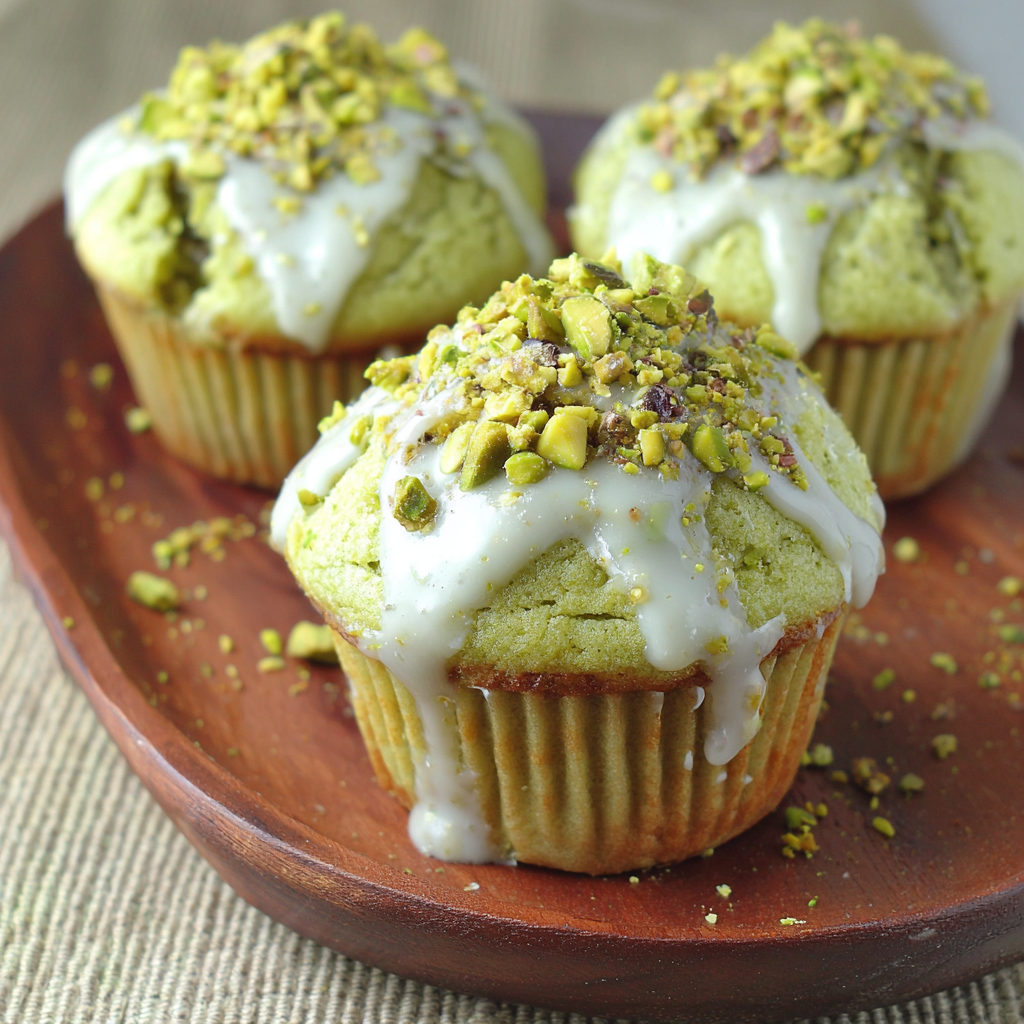
Decadent White Chocolate Pistachio Lava Muffins
Ingredients
Method
- Preheat your oven to 350°F (175°C).
- In a large bowl, whisk together the flour, sugar, baking powder, and salt.
- In another bowl, combine the melted butter, milk, eggs, and vanilla extract.
- Pour the wet mixture into the dry ingredients and gently stir until just combined.
- Fold in the white chocolate chips and chopped pistachios.
- Grease a muffin tin or line with paper liners.
- Spoon the batter into the muffin cups, filling each about two-thirds full.
- Bake for 18-20 minutes, or until golden brown and a toothpick comes out clean except for melted chocolate.
- Remove from the oven and let cool for a few minutes before transferring to a wire rack.
- Serve warm for that molten lava effect and enjoy!
Tried this recipe?
Let us know how it was!Introduction
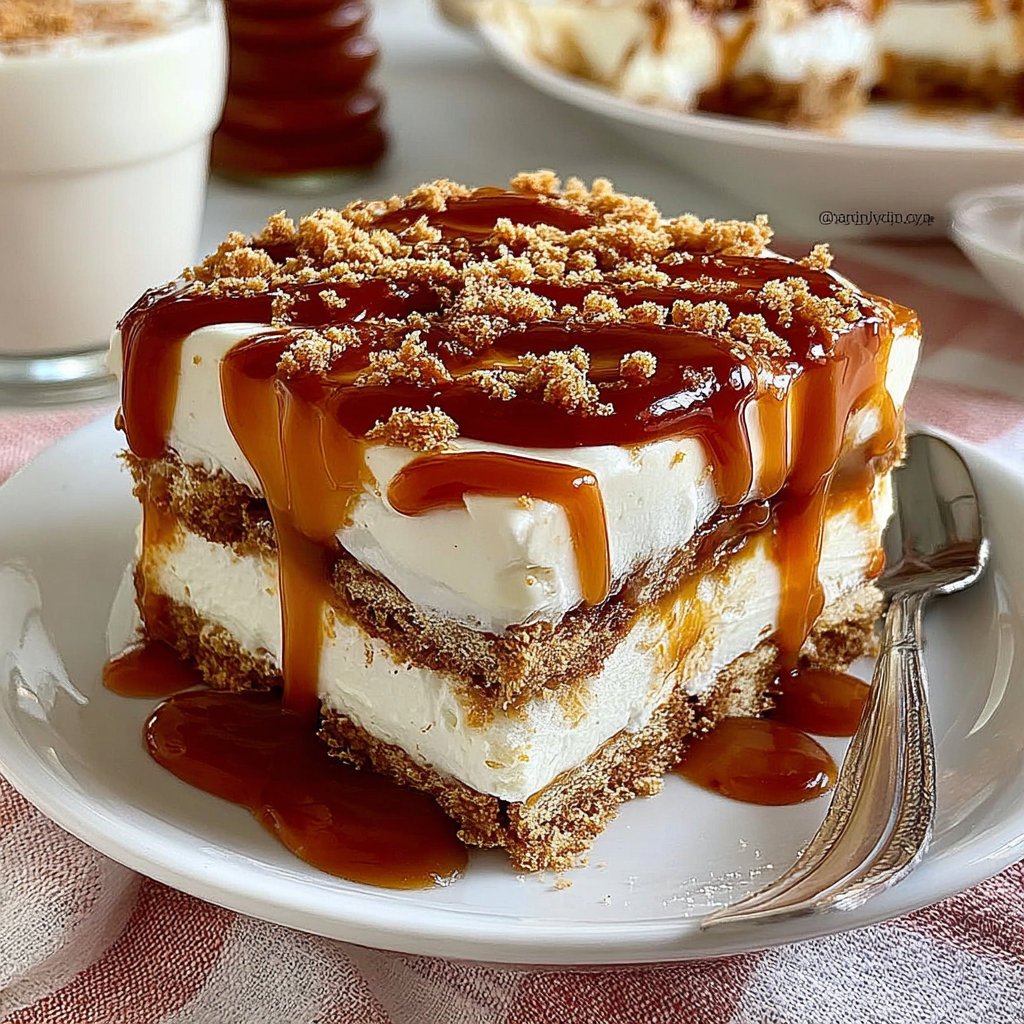
If you’re in search of a delectable dessert that requires minimal effort yet delivers maximum satisfaction, look no further than the No-Bake Biscoff Delight. This delightful treat combines the rich flavors of Biscoff cookies with creamy textures, creating a mouthwatering experience for any occasion.
Perfect for gatherings or simply to enjoy at home, this dessert eliminates the need for baking while ensuring impressive results. With each bite, you’ll discover layers of flavor that beautifully blend the sweet and slightly spiced notes of the beloved cookie spread.
Ingredients
- 250g Biscoff biscuits
These cookies serve as the foundation of your dessert, providing a crunchy texture and rich caramel flavor that’s synonymous with Biscoff. Their unique spice mix adds depth to the dish. - 100g unsalted butter, melted
Butter is crucial for binding the cookie crumbs together and gives the base a smooth, rich flavor. It enhances the overall texture, making it rich and luxurious. - 500g cream cheese, softened
Cream cheese brings a creamy, tangy flavor to the dessert that balances out the sweetness of the Biscoff. It also contributes to the dessert’s overall structure, ensuring it sets well. - 150g powdered sugar
Powdered sugar adds sweetness without the graininess of granulated sugar, allowing for a smooth, velvety filling that doesn’t overpower the other flavors. - 200g Biscoff spread
This spread provides an intense flavor boost and a creamy texture that enhances the cream cheese mixture. It adds a nostalgic taste that pairs beautifully with the biscuits. - 300ml heavy cream, whipped
Whipped cream adds lightness and airiness to the dessert, ensuring the final product is not too dense. It creates a delightful contrast to the richer layers. - Chocolate shavings, for garnish (optional)
While optional, chocolate shavings add a decorative touch and an extra layer of richness that complements the Biscoff flavors beautifully.
Directions & Preparation
Step 1: Crush the Biscoff biscuits into fine crumbs.
Start by placing the Biscoff biscuits in a food processor, letting the machine do the work for you. If you don’t have a food processor, you can place the biscuits in a zip-top bag and use a rolling pin to crush them by hand. Aim for a fine crumb texture, which is essential for creating a stable base that holds together when pressed.
Step 2: Mix the crumbs with melted butter until well combined.
In a mixing bowl, combine the crushed biscuits with melted butter, stirring until the crumbs are evenly coated. This mixture will act as the base of your dessert. It should hold together when pressed and resemble wet sand—too dry will crumble, so ensure it has enough butter for binding.
Step 3: Press the mixture into the bottom of a springform pan.
Using your fingers or the back of a measuring cup, firmly press the crumb and butter mixture into the bottom of the springform pan to create an even layer. This step is crucial as it forms the sturdy foundation for the layers above; a well-pressed crust will hold up to cutting and serving.
Step 4: In a large bowl, beat the softened cream cheese and powdered sugar together until smooth.
In a separate bowl, beat the softened cream cheese with powdered sugar using an electric mixer until fully combined and creamy. This ensures that the mixture is free of lumps, which is important for a silky texture in the final dessert.
Step 5: Add the Biscoff spread to the cream cheese mixture and blend well.
Incorporating the Biscoff spread into the cream cheese and sugar mixture is where the magic happens—this step not only adds flavor but also creates a cohesive filling that brings the dessert together. Be sure to scrape the sides of the bowl to incorporate all ingredients well.
Step 6: Fold in the whipped cream gently until well combined.
This is where you bring lightness to your filling. Gently fold the whipped cream into the Biscoff mixture in batches. Be careful not to deflate the whipped cream, as its airiness is what will keep your dessert from being dense and heavy.
Step 7: Pour the filling over the prepared crust and smooth the top.
Use a spatula to pour and spread the creamy filling evenly over the crust. It’s important to smooth the surface to accurately represent the layered effect of the dessert. Refrigerating for at least 4 hours or overnight helps the dessert set properly.
Step 8: Garnish with chocolate shavings before serving.
This optional step not only enhances presentation but also adds a complementary flavor note. Carefully sprinkle the chocolate shavings on top right before serving to keep them intact and elegant. This finishing touch can make the dessert feel even more special.

The Signature Flavor of Biscoff
Biscoff cookies and spreads are beloved for their distinctive caramel flavor and warm spice notes. This dessert showcases those defining characteristics by layering them ingeniously. Each bite encapsulates the soul of Biscoff, whether through the crunchy base or the velvety filling. The result is a flavor that transports your taste buds to a cozy café, enveloped in comforting warmth.
The Art of Layering
Layering is an essential aspect of creating visually stunning desserts, and in the No-Bake Biscoff Delight, this is a prominent feature. The contrasting textures of a crunchy base, creamy filling, and smooth garnishes elevate the overall eating experience. Mastering the art of layering not only improves presentation but also encourages a delightful interplay of flavors that enhance every bite.
Impressive Yet Effortless
Hosting can often lead to stress, particularly when it comes to dessert. The No-Bake Biscoff Delight is a standout option that requires little active time in the kitchen, allowing you the luxury of enjoying time with friends or family. Despite its impressive appearance and flavors, this treat embodies the ease of no-bake desserts, making it perfect for any home cook.
FAQs
How can I make the crust firmer?
If your crust is too crumbly or soft, try adding a bit more melted butter. Make sure to press the crust firmly into the pan to help it hold together.
What if my Biscoff layer isn't sweet enough?
You can taste the filling before it sets. If it requires more sweetness, mix in additional powdered sugar gradually.
Is there a way to add more chocolate flavor?
Absolutely! Incorporate chocolate chips into the filling or drizzle melted chocolate over the top to enhance the chocolate notes harmoniously.
Can I use alternative cookies for the crust?
Yes, you can substitute with digestive biscuits or graham crackers. Adjust the amount of butter slightly based on the absorbency of the cookies used.
What should I do if my filling is too dense?
If your filling turns out too dense, try folding in a bit more whipped cream to lighten it. This can balance the richness.
How do I know when it's set enough?
The dessert is ready when it feels firm to the touch. After refrigeration, it should hold its shape when sliced without wobbling.
Conclusion
The No-Bake Biscoff Delight is a fantastic dessert that beautifully marries simplicity with indulgent flavors. Its effortless preparation is ideal for both experienced cooks and novices alike.
Next time you need a show-stopping dessert without the fuss of baking, remember this delightful option. Edible proof that you can create something truly delicious with just a few ingredients and a little love.
Recipe Card
Decadent White Chocolate Pistachio Lava Muffins
Ingredients
Method
- Preheat your oven to 350°F (175°C).
- In a large bowl, whisk together the flour, sugar, baking powder, and salt.
- In another bowl, combine the melted butter, milk, eggs, and vanilla extract.
- Pour the wet mixture into the dry ingredients and gently stir until just combined.
- Fold in the white chocolate chips and chopped pistachios.
- Grease a muffin tin or line with paper liners.
- Spoon the batter into the muffin cups, filling each about two-thirds full.
- Bake for 18-20 minutes, or until golden brown and a toothpick comes out clean except for melted chocolate.
- Remove from the oven and let cool for a few minutes before transferring to a wire rack.
- Serve warm for that molten lava effect and enjoy!
Tried this recipe?
Let us know how it was!Notes
Additional serving suggestions: pair with a crisp salad, garlic bread, or roasted seasonal vegetables for balance.
For make-ahead, prep components separately and assemble just before heating to preserve texture.
Taste and adjust with acid (lemon/vinegar) and salt right at the end to wake up flavors.