If you’ve ever craved the crispy, flavorful goodness of a chimichanga but wanted to avoid deep frying, you’re in the right place. This guide will show you exactly how to make a baked chimichanga at home that’s healthier, easier, and just as delicious as the traditional version. Whether you’re feeding a crowd, prepping meals for the week, or just treating yourself to a Mexican-inspired feast, the baked chimichanga is the perfect dish.
We’ll start with the classic recipe and then dive into tips, variations, toppings, and all the insider knowledge you need to master this dish. By the end, you’ll not only know how to make a mouthwatering baked chimichanga, but also how to customize it to suit your tastes and impress anyone at the table.
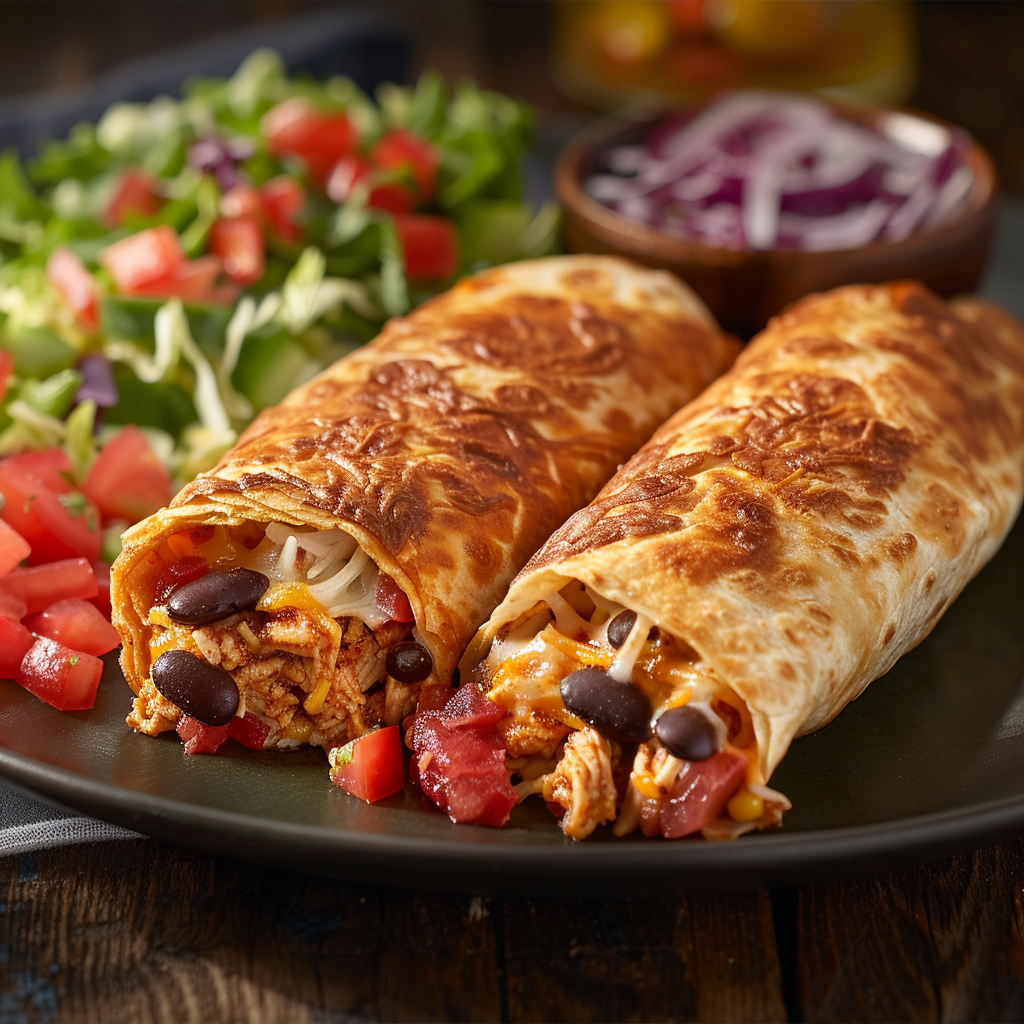
The Classic Baked Chimichanga Recipe
This recipe is quick, easy, and comes together in about 30 minutes. The result is a golden, crispy tortilla stuffed with a savory filling — without all the oil and mess of frying.
Ingredients:
- 2 cups cooked shredded chicken
- 1 cup shredded cheddar cheese
- ½ cup salsa
- 4 large flour tortillas
- Cooking spray
Directions:
- Preheat your oven to 400°F.
- In a bowl, combine the shredded chicken, cheddar cheese, and salsa.
- Lay out the tortillas on a clean surface. Spoon the chicken mixture into the center of each tortilla.
- Fold in the sides, then roll up tightly to form a burrito-like shape.
- Place seam-side down on a baking sheet lined with parchment paper.
- Lightly spray the tops of the chimichangas with cooking spray.
- Bake for about 20 minutes, or until the tortillas are golden brown and crispy.
- Remove from the oven, let cool slightly, and serve warm.
Prep Time: 10 minutes
Cooking Time: 20 minutes
Total Time: 30 minutes
Calories per chimichanga: ~350
Servings: 4
Now that you’ve got the basic recipe, let’s explore what makes the baked chimichanga such a fantastic choice and how you can make it even better.
Why Choose a Baked Chimichanga?
The baked chimichanga has become a favorite among home cooks for several good reasons:
- Healthier than fried: Baking uses little to no oil, cutting down on calories and fat.
- Less mess: No hot oil splattering around your kitchen.
- Easier cleanup: Just one baking sheet to wash.
- Crispy and delicious: You still get that satisfying crunch without the heaviness of deep frying.
- Family-friendly: Everyone loves them, and you can easily adjust the filling to suit picky eaters.
Once you try a baked chimichanga, you may never go back to the fried version.
Tips for Perfect Baked Chimichangas
Even though the recipe is simple, these expert tips can help you take your baked chimichanga to the next level.
Use fresh tortillas
Soft, fresh flour tortillas are more pliable and less likely to tear when rolling.
Don’t overstuff
Too much filling makes it hard to roll and may cause the chimichanga to burst open in the oven.
Roll tightly
Fold in the sides, then roll as snugly as possible to keep everything inside.
Spray generously
Lightly coating the tortillas with cooking spray ensures they turn beautifully golden and crispy.
Line your baking sheet
Parchment paper helps prevent sticking and makes cleanup even easier.
With these tips, your baked chimichanga will look and taste amazing every time.
Creative Variations on the Classic Baked Chimichanga
The great thing about this recipe is how easy it is to customize. Here are a few delicious ideas to try:
Beef & Bean Chimichanga
Replace the chicken with seasoned ground beef and add some refried beans for a hearty twist.
Veggie Chimichanga
Fill with sautéed bell peppers, onions, black beans, corn, and cheese for a vegetarian option.
Breakfast Chimichanga
Swap the chicken for scrambled eggs, bacon, and cheese. Serve with salsa on the side.
Spicy Chimichanga
Add diced jalapeños or a sprinkle of hot sauce to the filling for some heat.
BBQ Chicken Chimichanga
Use shredded BBQ chicken and a bit of Monterey Jack cheese for a smoky flavor.
These variations keep the baked chimichanga exciting and let you tailor it to your preferences.
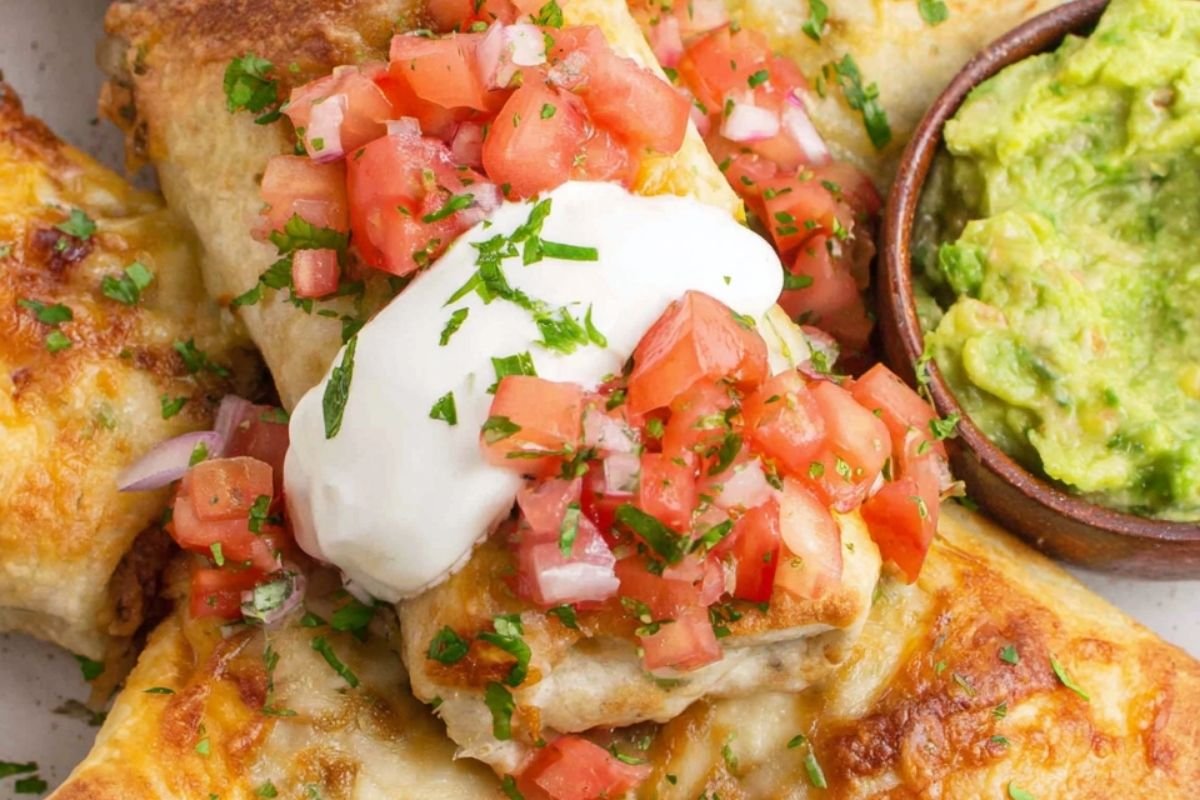
Delicious Toppings and Sides for Baked Chimichangas
While a baked chimichanga is satisfying on its own, adding toppings and sides can turn it into a full meal.
Topping Ideas:
- Guacamole or sliced avocado for creaminess
- Sour cream or Mexican crema for tang
- Pico de gallo or fresh salsa for brightness
- Shredded lettuce and diced tomatoes for crunch
- Pickled jalapeños or onions for a zesty kick
Side Dish Ideas:
- Mexican rice or cilantro-lime rice
- Refried or black beans
- Tortilla chips and queso dip
- Corn salad or elote (Mexican street corn)
- A simple green salad with lime vinaigrette
These pairings make your baked chimichanga dinner even more special.
How to Store and Reheat Baked Chimichangas
If you have leftovers (or want to make extra for later), here’s how to keep your chimichangas fresh and crispy.
Storing:
- Let them cool completely.
- Wrap individually in foil or place in an airtight container.
- Refrigerate for up to 4 days.
Freezing:
- Wrap each chimichanga tightly in foil.
- Place in a freezer bag and freeze for up to 3 months.
Reheating:
- For refrigerated chimichangas: unwrap and bake at 350°F for about 10–15 minutes.
- For frozen: bake at 350°F for 20–25 minutes, or until heated through.
Proper storage and reheating make the baked chimichanga a fantastic meal-prep option.
The History of the Chimichanga
The chimichanga has an interesting backstory. Legend has it that it was invented by accident when a burrito was dropped into hot oil at a Mexican restaurant in Arizona. Over time, the deep-fried burrito became a menu staple and gained a loyal following.
The baked chimichanga is a modern adaptation of this beloved dish, offering the same flavor and texture without all the oil. It’s proof that you can enjoy comfort food in a healthier way.
Healthier Swaps for Your Baked Chimichanga
If you want to lighten up your meal even more, try these easy swaps:
- Use whole-wheat or low-carb tortillas.
- Opt for reduced-fat cheese or use less of it.
- Replace some of the chicken with extra veggies.
- Use a lean protein like turkey or tofu.
- Skip the cheese entirely for a dairy-free version.
These changes can make your baked chimichanga more nutritious while keeping it tasty.
Why Make Chimichangas at Home?
You might wonder why you should bother making a baked chimichanga yourself instead of ordering takeout. Here are a few good reasons:
- Save money: A restaurant chimichanga can cost $10–15 each. At home, you can make four for less than that.
- Control the ingredients: You decide what goes in and how much salt, fat, and spice it has.
- Fresher and hotter: Nothing beats the taste of a freshly baked chimichanga right out of the oven.
- Fun to make: Rolling and baking chimichangas can be a fun family activity.
Once you try making them at home, you may never go back to restaurant chimichangas.
FAQs About Baked Chimichangas
Can I use corn tortillas instead of flour?
Not recommended — corn tortillas tend to crack and don’t roll as easily. Flour tortillas work best.
Can I make these ahead of time?
Yes, you can assemble and refrigerate or freeze them before baking. Just add a few extra minutes to the baking time if baking from cold or frozen.
Do I need to flip them while baking?
No, spraying them with oil on top ensures they crisp up nicely without flipping.
What cheese works best?
Cheddar is classic, but Monterey Jack, Pepper Jack, or a Mexican blend also work well.
How do I keep them from unrolling?
Make sure to roll tightly and place them seam-side down on the baking sheet.
Are baked chimichangas healthier than fried?
Yes — baking uses far less oil, reducing calories and fat while still giving you a crispy shell.
Can I make them gluten-free?
Absolutely — just use large gluten-free tortillas and check that your salsa and cheese are also gluten-free.
Conclusion: Why the Baked Chimichanga Should Be in Your Recipe Repertoire
The baked chimichanga is a shining example of how you can enjoy your favorite comfort foods in a healthier, more convenient way. Crispy, cheesy, and bursting with flavor, it’s a dish that works just as well for weeknight dinners as it does for entertaining guests.
With its customizable filling, endless topping options, and easy preparation, the baked chimichanga is a meal that anyone can master. Not only does it save you money and calories, but it also lets you create something fresh, satisfying, and fun — right in your own kitchen.
So the next time you’re craving a Mexican-inspired treat, skip the takeout and roll up a few of these golden, crispy delights yourself. Once you taste your own homemade baked chimichanga, you’ll wonder why you didn’t start making them sooner.