If you’ve ever browsed the health snack aisle, you’ve probably seen dozens of protein bars—some claiming to be “clean,” others “keto,” “vegan,” or “gluten-free.” But have you ever stopped and wondered if making homemade protein bars could be easier, cheaper, and even more nutritious?
Guess what? It absolutely is!
In this complete guide, you’ll learn how to make homemade protein bars with a simple base recipe (that’s endlessly customizable), understand the health benefits, explore variations, get tips for perfect texture, storage methods, and more. Whether you’re trying to fuel a workout, replace a meal, or just curb midday hunger, these bars have got your back.
Let’s dig in.
Why Homemade Protein Bars Are Better Than Store-Bought
1. Control Over Ingredients
When you make your own homemade protein bars, you’re in full control of what goes into your body. Many store-bought bars are loaded with:
- Artificial sweeteners
- Preservatives
- Mystery ingredients
- Processed sugar
With a DIY protein bar recipe, what you see is what you get. No chemicals. No strange aftertaste. Just whole, nourishing food.
2. More Affordable
Store-bought protein bars can cost anywhere between $2 to $4 per bar. If you’re eating one daily, that’s up to $120/month! With homemade protein bars, you can easily make 10 bars for under $10—just $1 per bar or less.
3. Customizable to Fit Your Diet
Whether you follow a vegan, keto, paleo, gluten-free, or low-FODMAP diet, you can tailor your homemade protein bars accordingly. Choose your protein, sweetener, and flavor profile—it’s that flexible.
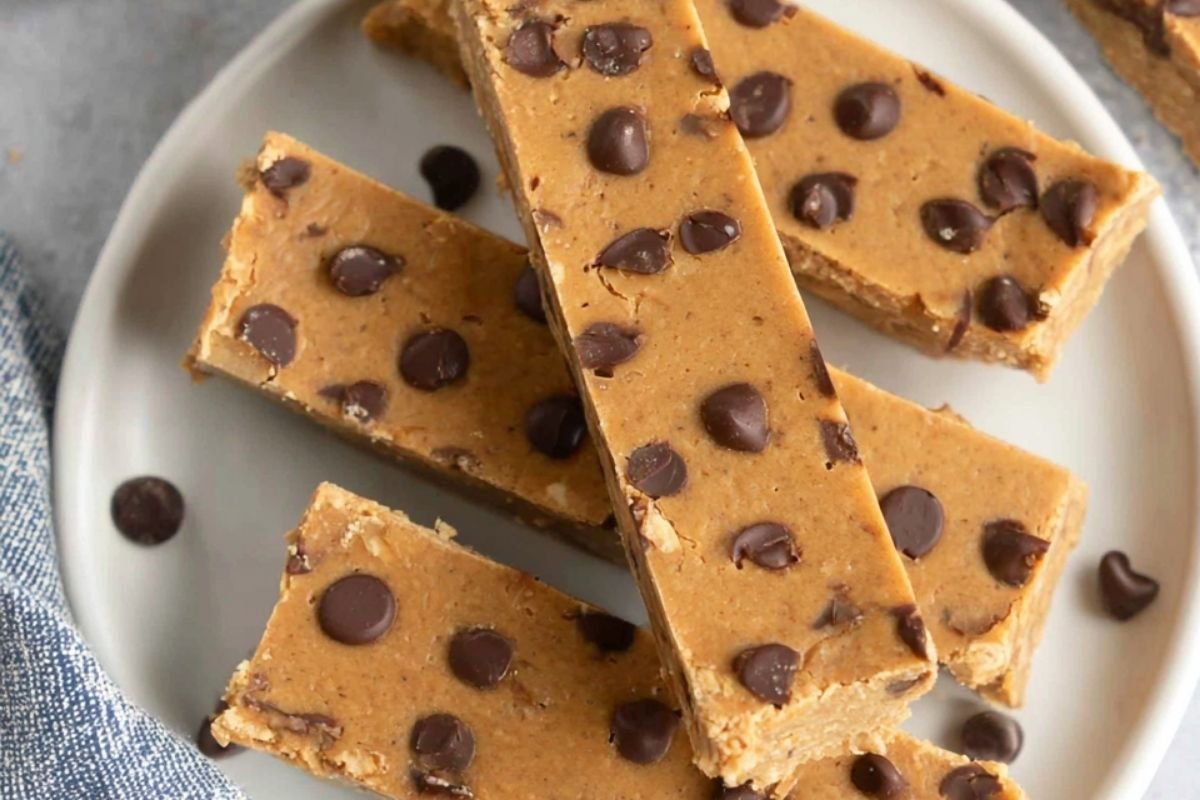
Basic Homemade Protein Bar Recipe
Let’s start with a simple yet delicious recipe.
Ingredients:
- 2 cups old-fashioned oats
- 1 cup peanut butter
- ½ cup honey
- ½ cup chocolate chips (optional)
- ½ cup protein powder (vanilla or chocolate)
Directions:
- Line an 8×8 pan with parchment paper.
- In a mixing bowl, combine oats, protein powder, peanut butter, and honey.
- Stir in the chocolate chips, if you’re using them.
- Press the mixture evenly into the prepared pan.
- Chill in the fridge for at least 1 hour.
- Slice into 10 even bars.
- Store in an airtight container in the refrigerator.
Prep Time: 10 minutes
Chill Time: 1 hour
Total Time: 1 hour 10 minutes
Calories per bar: ~220 kcal
Servings: 10 bars
This is a great foundation for hundreds of delicious variations. But before we get to those, let’s explore the key components and why they matter.
Understanding the Core Ingredients
Oats: The Base
Old-fashioned oats give your bars a chewy texture and are packed with soluble fiber, which helps:
- Lower cholesterol
- Stabilize blood sugar
- Keep you full longer
If you’re gluten-sensitive, opt for certified gluten-free oats.
Peanut Butter: The Binder
Nut butters provide healthy fats and protein. Peanut butter is the most common choice, but you can also try:
- Almond butter
- Cashew butter
- Sunflower seed butter (nut-free)
Choose unsweetened, natural nut butters to keep your bars clean.
Honey: The Sweetener and Sticky Agent
Honey acts as both a natural sweetener and a binding agent. It offers trace antioxidants and a nice dose of energy. For vegan bars, substitute with:
- Maple syrup
- Brown rice syrup
- Agave nectar
Protein Powder: The Boost
The star of the show in any homemade protein bar is, of course, protein powder. You can use:
- Whey protein (rich and creamy)
- Casein (slower digesting)
- Plant-based blends (pea, brown rice, or hemp)
Choose a flavor (vanilla, chocolate, peanut butter) that complements the rest of your ingredients.
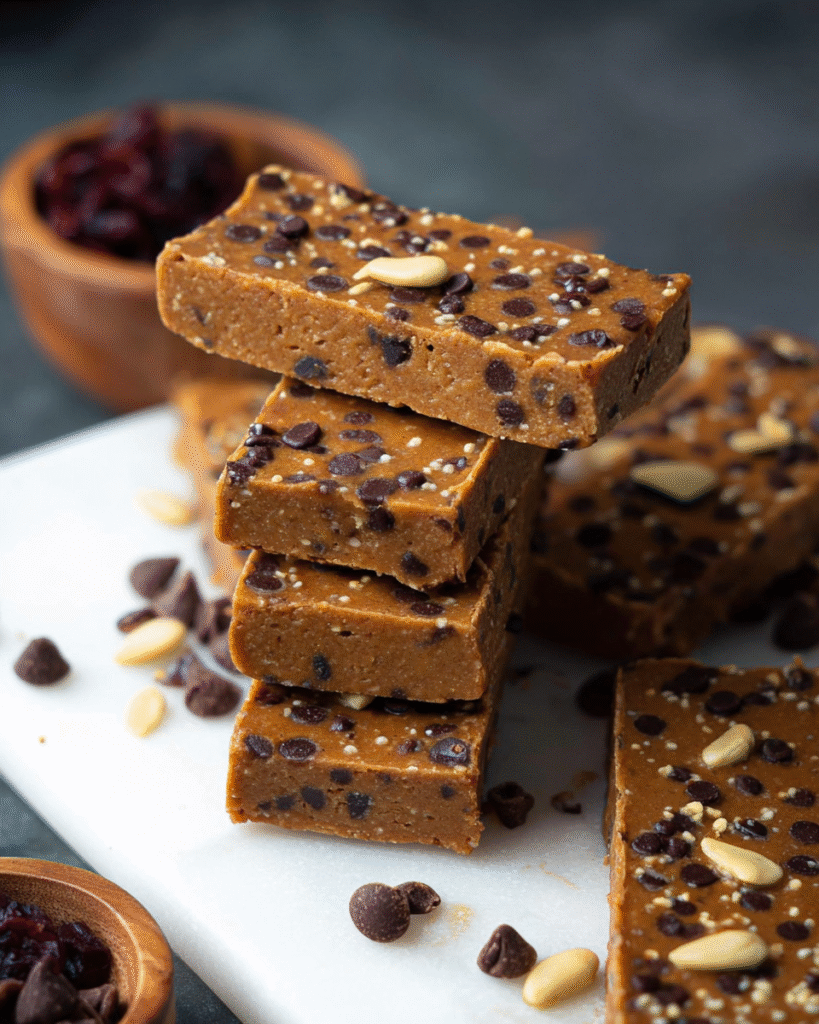
Optional Add-ins: Chocolate Chips
Chocolate chips not only add sweetness and crunch, but also make the bars more appealing for kids and picky eaters. Want a healthier option? Use:
- Dark chocolate chunks
- Cacao nibs
- Dried fruit (cranberries, raisins)
10 Tasty Variations of Homemade Protein Bars
Ready to experiment? Here are 10 fun and flavorful ways to upgrade your basic bar:
- Coconut Almond Delight – Add shredded coconut, chopped almonds, and vanilla protein powder.
- Chocolate Peanut Butter Crunch – Mix cocoa powder, mini chocolate chips, and a sprinkle of sea salt.
- Oatmeal Raisin Spice – Add cinnamon, nutmeg, and raisins to make it taste like a cookie.
- Berry Blast Bars – Mix in dried cranberries, blueberries, and use vanilla protein powder.
- Mocha Energy Bars – Use chocolate protein and a teaspoon of instant espresso powder.
- Apple Cinnamon Bars – Add dried apple chunks and cinnamon for a fall-inspired twist.
- Nut-Free Banana Bars – Swap nut butter with sunflower seed butter and add mashed banana.
- Choco-Mint Bars – Add a few drops of peppermint extract and use chocolate protein powder.
- Trail Mix Bars – Throw in pumpkin seeds, sunflower seeds, raisins, and coconut flakes.
- Tropical Paradise – Add dried mango, pineapple, and a touch of lime zest.
Each of these variations keeps the base method simple but introduces new flavors and textures, making homemade protein bars exciting every time.
How to Store Homemade Protein Bars
In the Refrigerator:
Keep bars in an airtight container and refrigerate. They last:
- Up to 2 weeks when chilled properly.
In the Freezer:
Wrap individual bars in parchment paper or foil, place in a freezer bag, and freeze. They last:
- Up to 3 months in the freezer.
Pro tip: Defrost overnight in the fridge or microwave for 15 seconds if you’re on the go.
Tips for the Best Homemade Protein Bars
- Don’t Overmix – Stir until just combined to avoid hardening.
- Use Fresh Nut Butter – Runny nut butter is easier to mix and helps everything bind well.
- Choose Quality Protein Powder – Not all protein powders taste good. Taste-test first!
- Chill Before Cutting – Always refrigerate your bars before slicing to avoid crumbling.
- Adjust Texture If Needed – Too dry? Add more honey or nut butter. Too wet? Add more oats or protein powder.
The Nutritional Benefits of Homemade Protein Bars
Eating homemade protein bars not only helps with muscle recovery and satiety, but also offers these perks:
- Steady Energy: Perfect as a pre-workout or mid-afternoon snack.
- Muscle Repair: Protein supports lean muscle maintenance and recovery.
- Weight Management: The combo of fiber, fat, and protein keeps you fuller, longer.
- Reduced Cravings: Healthy sweeteners satisfy without crashing your blood sugar.
FAQs about Homemade Protein Bars
1. Can I make protein bars without protein powder?
Yes, you can substitute protein powder with nut flours (like almond flour), powdered milk, or even collagen peptides, though the protein count will vary.
2. Are these bars okay for kids?
Absolutely! Just be mindful of allergens (nuts, dairy) and skip ingredients like espresso powder or too much caffeine.
3. How do I make my bars more crunchy or chewy?
For crunch, add chopped nuts, crisped rice cereal, or seeds. For chewy texture, add dates, dried fruits, or extra honey.
4. Can I bake these bars instead of chilling them?
This specific recipe is designed to be no-bake, but you can experiment with baked versions by adding an egg and reducing honey. Bake at 350°F (175°C) for 15–20 minutes.
5. What’s the best protein powder for homemade protein bars?
Whey protein is the most popular due to its creamy texture and flavor. If you’re vegan, go with pea or brown rice protein blends. Try to avoid overly chalky or artificially sweetened powders.
6. How do I prevent my bars from being too sticky?
Sticky bars often mean too much honey or not enough dry ingredients. Use parchment paper to press the mix evenly and adjust oat-to-honey ratio if needed.
Conclusion: Why You Should Start Making Homemade Protein Bars Today
Making your own homemade protein bars is one of the easiest, most rewarding kitchen projects you can take on. They’re affordable, customizable, delicious, and packed with nutrients. Whether you’re a fitness enthusiast, a busy parent, or just someone trying to make healthier choices, these bars are a total game-changer.
Say goodbye to overpriced, overprocessed snacks—and say hello to simple, satisfying, and nourishing bars you can make anytime.
Now it’s your turn. Grab those oats, protein powder, and peanut butter and start mixing. Once you try it, you’ll never go back to store-bought again.