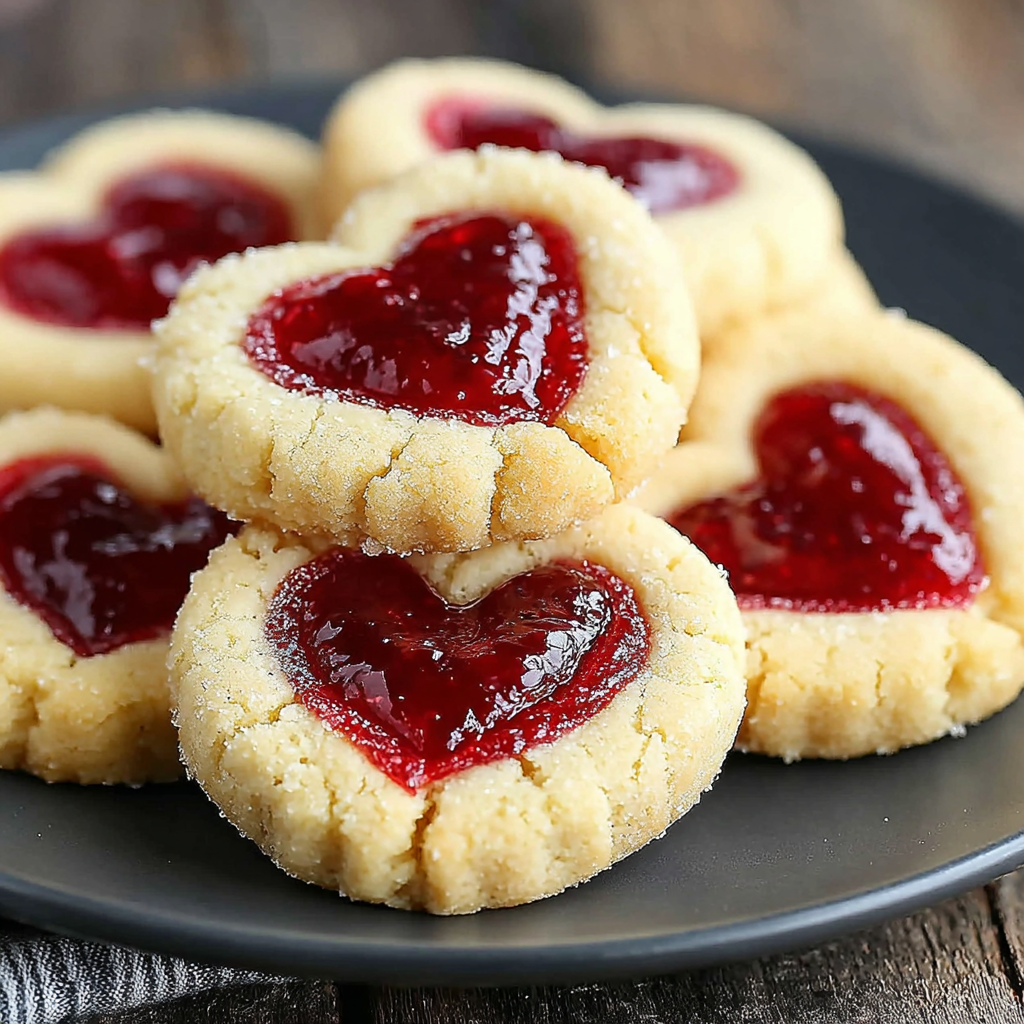
Heart Jam Thumbprint Cookies for Sweet Moments
Ingredients
Method
- Preheat the oven to 350°F (175°C).
- In a large mixing bowl, cream together the softened butter and sugar.
- Add the egg and vanilla extract to the creamed mixture, and mix until well combined.
- In a separate bowl, whisk together the flour, baking powder, and salt.
- Gradually add the dry ingredient mixture to the wet ingredients, mixing until just combined.
- Chill the cookie dough for at least 30 minutes to firm up.
- Scoop tablespoon-sized portions of dough and roll them into balls.
- Place the dough balls on a lined baking sheet, spacing them about 2 inches apart.
- Use your thumb or a spoon to create an indentation in the center of each ball.
- Fill each indentation with your chosen fruit jam.
- Bake in the preheated oven for 12-15 minutes, until the edges are lightly golden.
- Allow the cookies to cool on the baking sheet for a few minutes before transferring them to a wire rack.
Tried this recipe?
Let us know how it was!Introduction
There's something undeniably charming about thumbprint cookies. Their simple, rustic appearance belies a depth of flavor that can turn any gathering into a special occasion. The heart-shaped jam centers, in particular, evoke a sense of warmth and love that resonates well with both families and friends alike.
These cookies are not just a delight to the taste buds; they offer a wonderful opportunity for creativity in the kitchen. With a tender, buttery base and a fruity heart, they cater to various palates, making them perfect for celebrations or a cozy afternoon tea.
Ingredients
- 2 cups all-purpose flour
The backbone of your cookies, all-purpose flour provides structure, ensuring they hold their shape while still being tender and soft. It also allows for the even distribution of ingredients. - 1/2 cup unsalted butter, softened
Butter adds richness and contributes to the cookies' delightful flavor. The fat content also helps to create a tender crumb, providing that melt-in-your-mouth experience. - 3/4 cup granulated sugar
Sugar sweetens the cookies and aids in the browning process during baking, adding to the overall flavor and texture. It also helps create a slight crisp around the edges. - 1 large egg
Eggs serve as a binding agent, holding the ingredients together and helping the cookies rise. The yolk adds fat and richness, which enhances the flavor. - 1 teaspoon vanilla extract
Vanilla introduces a warm, sweet aroma that complements the other flavors. It elevates the overall taste profile, making the cookies more inviting. - 1/2 teaspoon baking powder
Baking powder provides the necessary lift, ensuring the cookies are light and airy rather than dense. It reacts with the liquids in the dough to create carbon dioxide bubbles. - 1/4 teaspoon salt
Salt balances the sweetness of the cookies, enhancing the overall flavor. It also strengthens the dough structure, making for a better texture. - 1 cup fruit jam, preferably berry-flavored
The heart of our cookies, fruit jam adds a burst of flavor and visual appeal. A berry jam provides a sweet-tart contrast that enhances the buttery cookie base.
Directions & Preparation
Step 1: Preheat the oven to 350°F (175°C).
Preheating the oven ensures an even baking temperature right from the beginning. This step is crucial for achieving cookies that are perfectly baked, allowing them to rise properly without becoming dense.
Step 2: In a large mixing bowl, cream together the softened butter and sugar.
Creaming the butter and sugar until light and fluffy incorporates air into the mixture, which helps create a lighter texture in the finished cookies. The creaming process is pivotal as it emulsifies the butter and sugar, making it easier to incorporate the other ingredients.
Step 3: Add the egg and vanilla extract to the creamed mixture, and mix until well combined.
Incorporating the egg and vanilla helps to create a cohesive dough. The egg serves as a binder while the vanilla enhances the overall flavor, resulting in a richer cookie.
Step 4: In a separate bowl, whisk together the flour, baking powder, and salt.
Mixing the dry ingredients separately allows for even distribution of the leavening agent and salt. This process prevents any clumping and ensures consistent texture and flavor throughout the cookies.
Step 5: Gradually add the dry ingredient mixture to the wet ingredients, mixing until just combined.
Carefully combining the dry and wet ingredients prevents overmixing, which can lead to tough cookies. Stopping as soon as the flour is integrated helps maintain a tender crumb.
Step 6: Chill the cookie dough for at least 30 minutes to firm up.
Chilling the dough firms it up, making it easier to handle when you form the thumbprint shapes. It also helps prevent the cookies from spreading too much during baking, resulting in a thicker, more chewy texture.
Step 7: Scoop tablespoon-sized portions of dough and roll them into balls.
This step helps create uniform cookies that bake evenly. Rolling them ensures cleanliness and an appealing round shape, setting the stage for the thumbprint.
Step 8: Place the dough balls on a lined baking sheet, spacing them about 2 inches apart.
Spacing is essential to allow for spreading as the cookies bake. If placed too close together, they can merge into each other, ruining their individual shapes.
Step 9: Use your thumb or a spoon to create an indentation in the center of each ball.
Creating a well for the jam is crucial as it allows the filling to nestle into the cookie, providing that signature thumbprint appearance. Be generous with the indentation to ensure ample filling.
Step 10: Fill each indentation with your chosen fruit jam.
Adding the jam not only enhances sweetness but also creates a striking visual contrast against the cookie dough. The jam will caramelize slightly during baking, adding depth to the flavors.
Step 11: Bake in the preheated oven for 12-15 minutes, until the edges are lightly golden.
Proper baking time is essential for obtaining the right texture. Underbaking may lead to doughy cookies, while overbaking can produce a dry consistency. Watch closely for a light golden edge.
Step 12: Allow the cookies to cool on the baking sheet for a few minutes before transferring them to a wire rack.
Cooling the cookies on the sheet allows them to set up and firm, while transferring them prevents sogginess. Cooling on a rack helps maintain their crispness and avoids steamy conditions.

Experimenting with Flavors and Jams
While traditional thumbprint cookies often feature berry jams, the beauty of this recipe lies in its flexibility. You can experiment with various fruit preserves, like orange marmalade or even chocolate spread for a unique twist. Each variation not only introduces different flavor profiles but also enhances the aesthetics, making your cookies an even more delightful treat.
Perfecting the Texture
Achieving that ideal texture is a harmonious balance of temperature and timing. Ensuring your butter is adequately softened facilitates smoother mixing, while chilling the dough before baking helps prevent excessive spreading. Additionally, the right balance of flour and butter contributes to a cookie that's tender yet sturdy enough to hold its shape under the rich jam topping.
Celebration Cookies for Every Occasion
These Heart Jam Thumbprint Cookies are not just sweets; they're tokens of affection. Whether you're baking for a holiday, a family gathering, or simply to lift someone’s spirits, they serve as a heartfelt gesture. Their unique design makes them a thoughtful addition to any dessert table, and they can even be personalized with different colors and flavors of jam to match any celebration.
FAQs
What type of jam works best for thumbprint cookies?
Berry jams like raspberry or strawberry are popular choices for their sweet-tart flavor, but feel free to explore apricot or fig jams for unique tastes.
How can I adjust the thickness of my cookie dough?
If your dough feels too thick and crumbly, you can add a teaspoon of milk at a time until it reaches the desired consistency.
What should I do if my cookies spread too much during baking?
If the cookies spread excessively, it often means the dough wasn’t chilled long enough. Make sure to chill the dough for at least 30 minutes before baking.
Can I make these cookies smaller or larger?
Absolutely! Just adjust the baking time accordingly. Smaller cookies may need 10-12 minutes, while larger ones could need more than 15 minutes.
What happens if I accidentally overbake my cookies?
Overbaking can result in dry cookies, so always watch closely towards the end of the baking time. It’s better to err on the side of slightly underbaking.
Can I decorate these cookies for a special occasion?
Definitely! You can drizzle melted chocolate or icing over them for an extra decorative touch that enhances both appearance and flavor.
Conclusion
Heart Jam Thumbprint Cookies are a delightful addition to any baking repertoire, combining simplicity with a touch of elegance. Their warm flavors and charming presentation make them a perfect treat for sharing with loved ones.
Whether enjoyed with a cup of tea or presented as gifts, these cookies bring both joy and deliciousness to the forefront of your culinary endeavors. With a few adjustments, you can personalize them to make them uniquely yours.
Recipe Card
Heart Jam Thumbprint Cookies for Sweet Moments
Ingredients
Method
- Preheat the oven to 350°F (175°C).
- In a large mixing bowl, cream together the softened butter and sugar.
- Add the egg and vanilla extract to the creamed mixture, and mix until well combined.
- In a separate bowl, whisk together the flour, baking powder, and salt.
- Gradually add the dry ingredient mixture to the wet ingredients, mixing until just combined.
- Chill the cookie dough for at least 30 minutes to firm up.
- Scoop tablespoon-sized portions of dough and roll them into balls.
- Place the dough balls on a lined baking sheet, spacing them about 2 inches apart.
- Use your thumb or a spoon to create an indentation in the center of each ball.
- Fill each indentation with your chosen fruit jam.
- Bake in the preheated oven for 12-15 minutes, until the edges are lightly golden.
- Allow the cookies to cool on the baking sheet for a few minutes before transferring them to a wire rack.
Tried this recipe?
Let us know how it was!Notes
Additional serving suggestions: pair with a crisp salad, garlic bread, or roasted seasonal vegetables for balance.
For make-ahead, prep components separately and assemble just before heating to preserve texture.
Taste and adjust with acid (lemon/vinegar) and salt right at the end to wake up flavors.