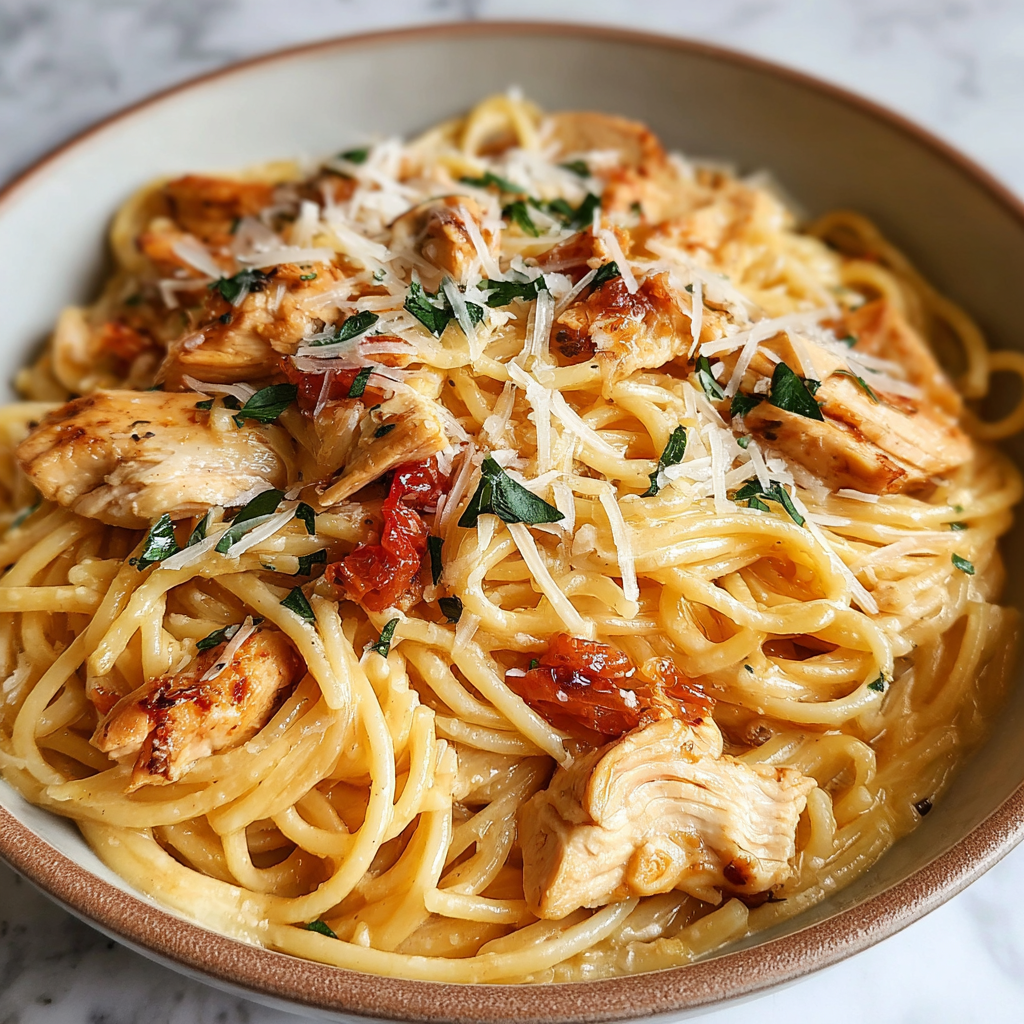
Indulge in Creamy Spaghetti Carbonara with Chicken
Ingredients
Method
- Cook the spaghetti in salted boiling water until al dente.
- In a large skillet, cook the pancetta over medium heat until crispy.
- Add diced chicken to the skillet, cooking until golden and cooked through.
- Stir in the minced garlic and cook until fragrant, about 1 minute.
- In a bowl, whisk together eggs, grated Pecorino Romano, and a generous amount of black pepper.
- Once spaghetti is cooked, drain and immediately add to the skillet with pancetta and chicken.
- Remove the skillet from heat, then quickly pour in the egg and cheese mixture, tossing to combine.
- Add reserved pasta water as needed to adjust the sauce's consistency, then season with salt and pepper.
- Serve immediately, garnished with fresh parsley and extra Pecorino Romano if desired.
Tried this recipe?
Let us know how it was!Introduction
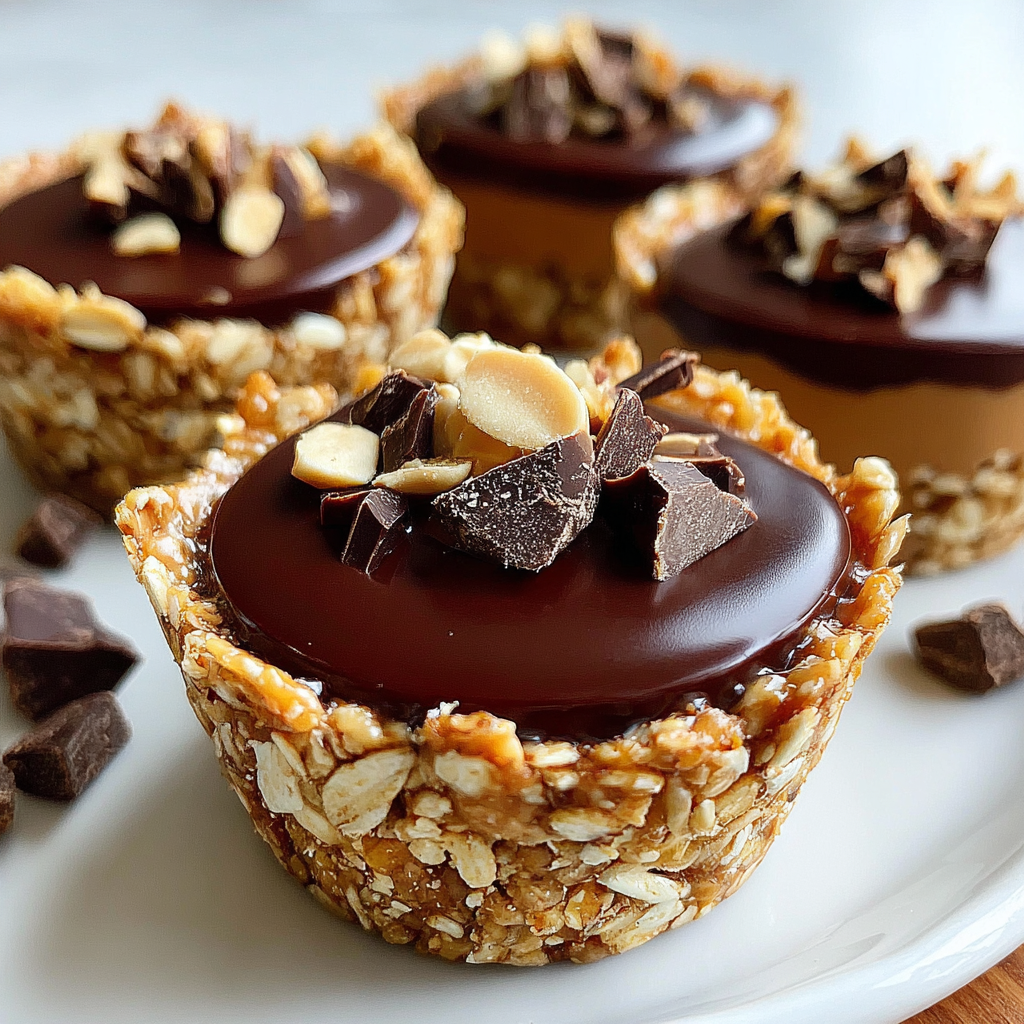
Looking for a quick and satisfying treat? No-bake peanut butter oat cups are your answer. With minimal fuss, these delicious bites come together in a snap, making them perfect for busy afternoons or as a wholesome snack for kids.
The combination of peanut butter, oats, and a touch of sweetness creates a chewy texture that is both filling and nutritious. Plus, they require no cooking, meaning you can enjoy your treats faster than ever. Let’s dive into creating these delightful cups that are sure to please.
Ingredients
- 1 cup rolled oats
Rolled oats provide the base for these cups, offering fiber and whole grains that contribute to a satisfying bite. They also absorb moisture, helping to bind the mixture together. - 1/2 cup peanut butter
Peanut butter adds a rich, creamy texture and a nutty flavor to the cups. It's also a great source of protein and healthy fats, making these treats more filling. - 1/4 cup honey or maple syrup
This natural sweetener not only adds sweetness but also helps to bind the ingredients. It creates a cohesive mixture that holds its shape while providing a subtle flavor. - 1/4 cup dark chocolate chips (optional)
Adding chocolate chips gives a delightful richness and an indulgent touch to the oat cups. They melt slightly, adding an extra layer of flavor and texture. - 1/2 teaspoon vanilla extract
Vanilla extract enhances the overall flavor profile, adding warmth and complexity. It rounds out the sweet and nutty notes, making each bite more enjoyable. - A pinch of salt
Salt balances the sweetness and highlights the flavors in the peanut butter and honey. It enhances the overall taste experience, ensuring it isn't one-dimensional.
Directions & Preparation
Step 1: Gather all your ingredients and tools.
Start by collecting all ingredients and necessary tools like mixing bowls, a spatula, and a baking tray. This prep ensures that you have everything within reach, streamlining the process and making it more efficient.
Step 2: In a large bowl, combine the rolled oats and peanut butter.
Mixing oats with peanut butter first helps evenly distribute the peanut butter's flavor throughout the oats. Breaking up clumps of oats while mixing promotes uniformity in texture, providing a better final product.
Step 3: Add honey (or maple syrup) and vanilla extract to the mixture.
Incorporating the sweetener and vanilla enhances the mix’s flavor while ensuring that it holds together. Use a spatula to mix thoroughly, making sure every ingredient is well combined and no dry oats remain.
Step 4: Stir in the dark chocolate chips and a pinch of salt.
Adding chocolate chips and salt at this stage ensures that they are evenly distributed throughout the mixture. This step provides bursts of chocolatey goodness and balances the sweetness with salty undertones.
Step 5: Line a baking tray with parchment paper and transfer the mixture into it.
Using parchment paper prevents the mixture from sticking and helps in easy removal once set. Press the mixture firmly into the tray to create even cups, ensuring they hold their shape during cooling.
Step 6: Refrigerate the mixture for at least 30 minutes before cutting.
Chilling the mixture allows it to firm up, making it easier to slice into cups. The refrigeration helps meld the flavors together, resulting in a tastier treat when you finally enjoy them.
Step 7: Once set, cut into squares or use a cookie cutter for fun shapes.
Using a sharp knife to cut squares or a cookie cutter for unique shapes allows for presentation variety. This step can make them more enticing, especially for kids, enhancing the joy of eating these treats.
Step 8: Store in an airtight container in the refrigerator.
Storing the oat cups in an airtight container helps maintain their freshness and texture. Keeping them in the fridge also elevates the flavor, making them more refreshing when you’re ready to enjoy.

Elevating Your Oat Cups with Add-Ins
The beauty of no-bake peanut butter oat cups lies in their versatility. Feel free to add ingredients like dried fruits, nuts, or seeds to elevate the flavor and enhance the texture. Be creative! Chopped dried apricots or almonds can add a delightful crunch, while chia seeds can boost the nutritional content.
Perfect Pairings: Beverages to Enjoy with Oat Cups
Pairing your no-bake peanut butter oat cups with beverages can enhance your snacking experience. A cold glass of almond milk or a warm cup of herbal tea works wonderfully. The flavors of these drinks complement the nutty sweetness of the oat cups, creating a balanced and satisfying treat.
Customizing Your Sweetness Level
Adjusting the sweetness of your oat cups is simple. If you prefer a less sweet treat, reduce the honey or maple syrup slightly. On the other hand, for a more indulgent option, feel free to add a little extra. This flexibility ensures your oat cups align perfectly with your taste preferences.
FAQs
What if my mixture is too thick?
If the mixture is too thick to combine, a splash of almond milk or another liquid can help loosen it up. This will make it easier to mix and shape.
Can I substitute peanut butter with another nut or seed butter?
Absolutely! Almond butter, sunflower seed butter, or even cashew butter can be used in place of peanut butter, creating unique flavors and accommodating nut allergies.
How do I know the oat cups are set properly?
The oat cups should be firm to the touch after chilling for approximately 30 minutes. If they feel sticky, give them more time in the refrigerator to solidify.
What if I want to make these oat cups less dense?
To achieve a lighter texture, try adding a bit more oats and a small amount of additional honey or syrup to the mixture, which can help balance the density.
How do I get uniform shapes when cutting?
For uniform shapes, use a sharp knife and a ruler for precise measurements. Alternatively, using a cookie cutter allows for creative shapes and sizes.
Can I replace honey with agave syrup?
Yes, agave syrup is a great alternative to honey in this recipe, offering a similar sweetness and binding property without compromising taste.
Conclusion
No-bake peanut butter oat cups are not just simple to make; they are adaptable and satisfyingly delicious. With their chewy texture, rich flavor, and easy preparation, these treats will delight any home cook.
So the next time you're craving a sweet snack, consider these oat cups. They offer a delicious solution that comes together in no time, all while being an enjoyable culinary project to share with family and friends.
Recipe Card
Indulge in Creamy Spaghetti Carbonara with Chicken
Ingredients
Method
- Cook the spaghetti in salted boiling water until al dente.
- In a large skillet, cook the pancetta over medium heat until crispy.
- Add diced chicken to the skillet, cooking until golden and cooked through.
- Stir in the minced garlic and cook until fragrant, about 1 minute.
- In a bowl, whisk together eggs, grated Pecorino Romano, and a generous amount of black pepper.
- Once spaghetti is cooked, drain and immediately add to the skillet with pancetta and chicken.
- Remove the skillet from heat, then quickly pour in the egg and cheese mixture, tossing to combine.
- Add reserved pasta water as needed to adjust the sauce's consistency, then season with salt and pepper.
- Serve immediately, garnished with fresh parsley and extra Pecorino Romano if desired.
Tried this recipe?
Let us know how it was!Notes
Additional serving suggestions: pair with a crisp salad, garlic bread, or roasted seasonal vegetables for balance.
For make-ahead, prep components separately and assemble just before heating to preserve texture.
Taste and adjust with acid (lemon/vinegar) and salt right at the end to wake up flavors.