Delightful Christmas Pinwheel Cookies for Celebrations
Ingredients
Method
- In a large bowl, whisk together the flour and baking powder.
- Cream the softened butter and granulated sugar until light and fluffy.
- Add the egg and vanilla extract to the butter-sugar mixture, mixing until combined.
- Gradually add the flour mixture to the wet ingredients, mixing until a soft dough forms.
- Divide the dough into three equal portions.
- Color one portion with cocoa powder, and the other two with gel food coloring.
- Roll each colored dough into rectangles on parchment paper.
- Layer the doughs on top of each other, gently pressing to adhere.
- Tightly roll the layered dough into a log, then wrap it in plastic wrap.
- Preheat the oven to 350°F (175°C).
- Slice the chilled log into ¼-inch thick rounds and place them on a baking sheet.
- Bake for 10-12 minutes or until the edges are lightly golden.
Tried this recipe?
Let us know how it was!Introduction
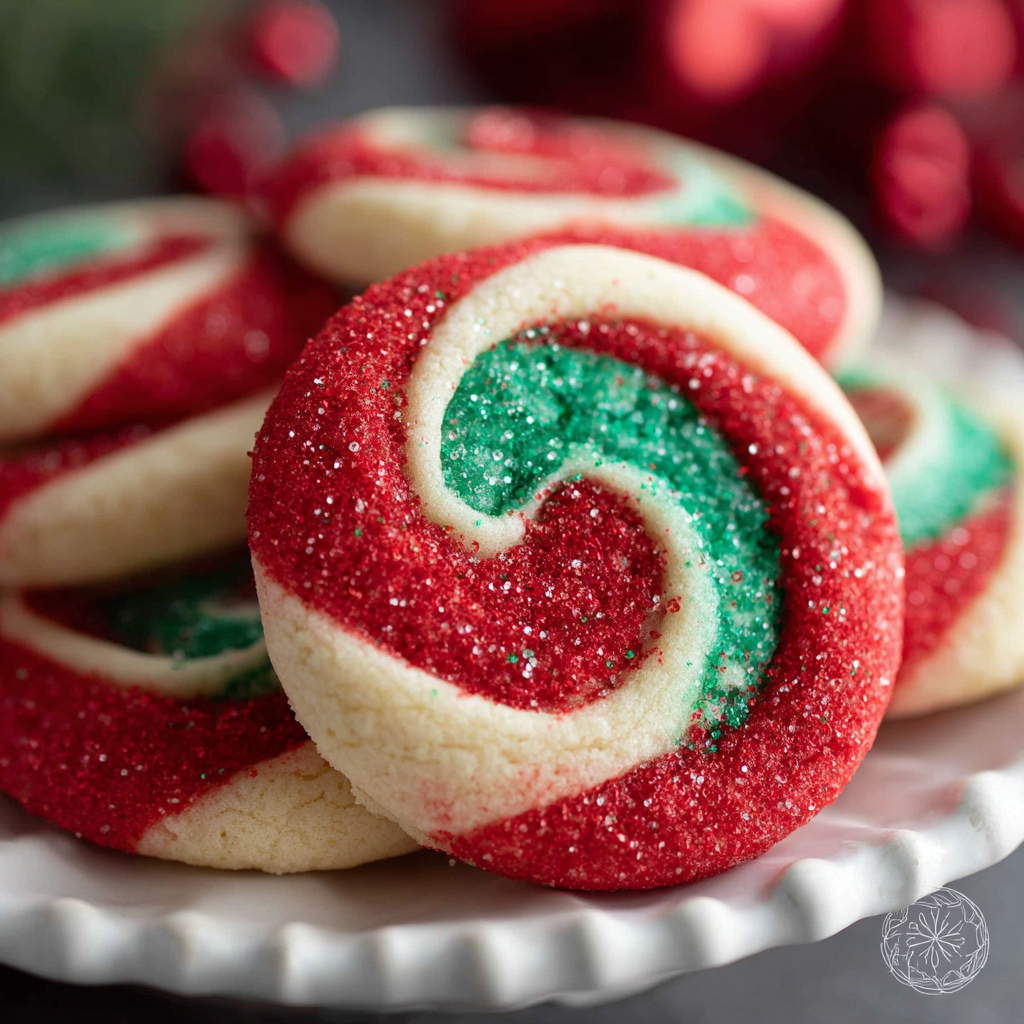
Christmas is a time for joy, celebration, and of course, delicious treats. Among the many festive recipes that grace our tables during the holiday season, Christmas Pinwheel Cookies stand out for their vibrant colors and delightful flavors. These cookies are not only visually stunning but also bring a joyful spirit to any gathering.
The beauty of Christmas Pinwheel Cookies lies in their versatility. You can customize the dough with various flavors and colors, layering them to create an eye-catching design. Whether you’re baking for a family gathering, a cookie exchange, or simply as a sweet treat for yourself, these cookies are sure to impress. Let's embark on this delightful baking journey.
Ingredients
- 2 ¾ cups all-purpose flour
All-purpose flour is the backbone of almost any cookie recipe. It provides the necessary structure while allowing the cookies to remain soft and chewy. - 1 teaspoon baking powder
Baking powder serves as a leavening agent, helping the cookies rise slightly and achieve a tender texture. - 1 cup unsalted butter, softened
Butter not only contributes to the flavor of the cookies but also affects their texture, making them rich and tender. - 1 cup granulated sugar
Granulated sugar sweetens the cookies, and its interaction with butter creates a creamy texture that contributes to the overall mouthfeel. - 1 large egg
Eggs act as a binding agent, helping to hold the ingredients together while also adding moisture, which is crucial for texture. - 1 teaspoon vanilla extract
Vanilla extract enhances the overall flavor profile, creating a warm, inviting taste that plays beautifully with the other ingredients. - ½ cup powdered sugar
Powdered sugar is often added for both sweetness and a smooth texture, especially if you’re incorporating it into the colored doughs. - ¼ cup cocoa powder
Cocoa powder introduces rich chocolate flavor into part of the dough while also contributing to the visual contrast in your pinwheels. - Gel food coloring (red and green)
Gel food coloring allows you to achieve vibrant hues without altering the consistency of your dough, making each layer pop.
Directions & Preparation
Step 1: In a large bowl, whisk together the flour and baking powder.
Whisking the flour and baking powder ensures that the leavening agent is evenly distributed throughout the flour. This step is crucial as it affects how the cookies rise and their final texture. Make sure there are no lumps in the flour blend to ensure a smooth dough.
Step 2: Cream the softened butter and granulated sugar until light and fluffy.
Creaming the butter and sugar is a key step in cookie making. This process introduces air into the mixture, resulting in a lighter texture. Aim for a pale, fluffy mixture that resembles whipped cream, which will enhance the cookies' overall volume and texture.
Step 3: Add the egg and vanilla extract to the butter-sugar mixture, mixing until combined.
Incorporating eggs and vanilla at this stage contributes to the richness of the cookies. Eggs bind the ingredients, while vanilla enhances flavor. Mix until just combined to avoid overworking the dough, which can lead to tough cookies.
Step 4: Gradually add the flour mixture to the wet ingredients, mixing until a soft dough forms.
Adding the flour gradually prevents clumping and ensures a thorough mix. A soft dough is desired; it should be slightly sticky but manageable. Overmixing can lead to tough cookies, so stop mixing as soon as no dry flour remains.
Step 5: Divide the dough into three equal portions.
Dividing the dough is essential for creating the pinwheel effect. Each piece will be colored differently. Make sure your portions are even to achieve uniform pinwheels, which will ensure they bake evenly.
Step 6: Color one portion with cocoa powder, and the other two with gel food coloring.
This step is where the fun begins! The cocoa powder will create a rich chocolate layer, while the gel colors will produce vibrant red and green layers. Make sure to knead the color into the dough thoroughly to achieve an even hue across the entire portion.
Step 7: Roll each colored dough into rectangles on parchment paper.
Rolling the dough between pieces of parchment paper helps prevent sticking and makes it easier to handle. Aim for uniform thickness across each layer for consistent baking. Ensure that the edges are straight to form a clean pinwheel when assembling.
Step 8: Layer the doughs on top of each other, gently pressing to adhere.
This step is crucial for creating that signature pinwheel look. Gently press each layer together, being careful not to squish out any air. Ensuring the layers stick together while retaining some volume will contribute to an attractive presentation after baking.
Step 9: Tightly roll the layered dough into a log, then wrap it in plastic wrap.
Rolling tightly is essential to maintain defined layers in the baked cookies. Once rolled, wrapping in plastic helps retain moisture and shape. Chill in the refrigerator for about an hour to firm up the dough, which will make slicing easier.
Step 10: Preheat the oven to 350°F (175°C).
Preheating the oven is critical for ensuring that the cookies bake evenly. An adequately heated oven allows for consistent cooking, giving the cookies the right texture and preventing them from spreading too much during baking.
Step 11: Slice the chilled log into ¼-inch thick rounds and place them on a baking sheet.
Slicing the log evenly ensures uniform baking and an appealing presentation. Use a sharp knife to make clean cuts and prevent the layers from separating. Spacing the cookies out on the baking sheet is important for proper expansion while baking.
Step 12: Bake for 10-12 minutes or until the edges are lightly golden.
Baking until the edges turn golden indicates that the cookies are done. Keep an eye on them, as baking times can vary based on your oven. Allowing them to cool on the baking sheet for a few minutes will help them firm up before transferring to a wire rack.

Creating Colorful Layers for Stunning Visual Appeal
The artistry of Christmas Pinwheel Cookies lies in their colorful layers. By adjusting the amount of gel food coloring, you can create various shades, making your cookies perfectly suited for the festive season. Consider festive themes and match colors to your holiday decor for an impressive display that will captivate your guests.
Flavor Variations to Spice Up Your Pinwheels
While the classic recipe features delicious vanilla and chocolate, don’t hesitate to experiment with flavors. Adding orange or peppermint extracts can create a delightful holiday twist. Think about including spices like cinnamon or ginger for an extra layer of warmth and richness, enhancing the cookies’ festive presence.
Tips for Perfect Texture in Every Bite
Achieving the perfect texture in your Christmas Pinwheel Cookies is all about balance. Ensure that the butter is adequately softened, which will help incorporate air during creaming. Additionally, avoid overmixing the dough after adding flour to keep your cookies tender and melt-in-the-mouth delicious.
FAQs
What can I do if my cookie dough is too soft?
If your dough is too soft to roll, refrigerate it for an additional 30 minutes until it firms up. You can also add a small amount of flour, one tablespoon at a time, until you reach the desired consistency.
Can I use flavored extracts other than vanilla?
Absolutely! Feel free to explore other extracts like almond or peppermint to enhance the flavor profile of your cookies. Just keep in mind to use them in moderation.
What if my cookie slices fall apart while baking?
If your pinwheels fall apart, it could be due to overbaking or not rolling tightly enough. Ensure you've adequately chilled the dough and sliced it with care. A tighter roll will help maintain structure.
How can I make my cookies even more festive?
You can sprinkle colored sugar or edible glitter on top of the cookies before baking for extra holiday flair. This adds an eye-catching finish that complements your colorful pinwheels.
Is it possible to make these cookies nut-free?
Yes, simply ensure that any substitutes like nut flours are omitted and check that your ingredients are labeled nut-free. This way, you can enjoy the cookies without any worry.
What if my cookies taste bland after baking?
If you find your cookies lack flavor, consider increasing the quantity of vanilla extract or adding a pinch of salt to enhance the overall flavor. A touch of salt can elevate sweetness considerably.
Conclusion
Christmas Pinwheel Cookies are a delightful addition to your holiday traditions, blending visual appeal with tasty flavor in every bite. As you gather with friends and family, these festive treats are sure to spark joy and conversation.
Remember that the beauty of these cookies lies in their customizable nature. Don't hesitate to experiment with flavors and colors to create your unique version, making them a cherished holiday favorite in your home.
Recipe Card
Delightful Christmas Pinwheel Cookies for Celebrations
Ingredients
Method
- In a large bowl, whisk together the flour and baking powder.
- Cream the softened butter and granulated sugar until light and fluffy.
- Add the egg and vanilla extract to the butter-sugar mixture, mixing until combined.
- Gradually add the flour mixture to the wet ingredients, mixing until a soft dough forms.
- Divide the dough into three equal portions.
- Color one portion with cocoa powder, and the other two with gel food coloring.
- Roll each colored dough into rectangles on parchment paper.
- Layer the doughs on top of each other, gently pressing to adhere.
- Tightly roll the layered dough into a log, then wrap it in plastic wrap.
- Preheat the oven to 350°F (175°C).
- Slice the chilled log into ¼-inch thick rounds and place them on a baking sheet.
- Bake for 10-12 minutes or until the edges are lightly golden.
Tried this recipe?
Let us know how it was!Notes
Additional serving suggestions: pair with a crisp salad, garlic bread, or roasted seasonal vegetables for balance.
For make-ahead, prep components separately and assemble just before heating to preserve texture.
Taste and adjust with acid (lemon/vinegar) and salt right at the end to wake up flavors.