Decadent Gourmet Oreo Bark for Home Entertaining
Ingredients
Method
- Prepare a baking sheet with parchment paper
- Melt the dark chocolate
- Mix in vanilla extract
- Fold in the crushed Oreos
- Spread the mixture onto the baking sheet
- Melt the white chocolate and drizzle
- Sprinkle on decorations
- Chill until set
- Break into pieces and serve
Tried this recipe?
Let us know how it was!Introduction
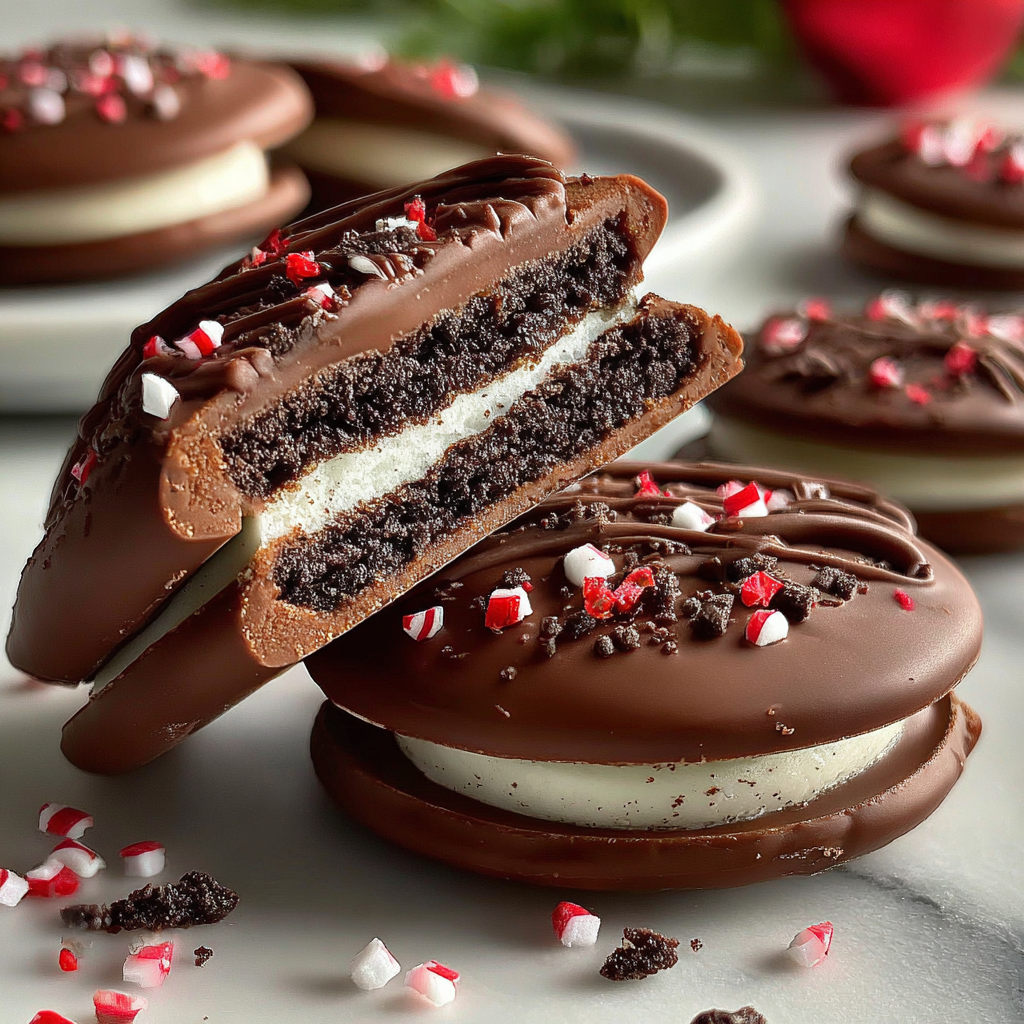
If you're looking for a simple yet indulgent treat to impress your friends and family, gourmet Oreo bark is the answer. This delightful dessert combines the classic flavors of Oreos with rich chocolate and a variety of creative toppings that elevate every bite. The best part? It’s quick to make and can be customized to suit your flavor preferences.
Gourmet Oreo bark is not just a visual treat; it’s a symphony of textures and flavors—the crunch of Oreos, the creaminess of chocolate, and the surprise of toppings all create a unique snacking experience. Whether you're preparing for a party, gifting a sweet package, or simply satisfying your sweet tooth, this bark is sure to please.
Ingredients
- 12 Oreos, crushed
These classic cookies provide a crunchy texture and a rich, chocolatey flavor base that complements the sweet bark. Crushing the Oreos into small pieces contributes to the overall richness and ensures every bite includes that signature Oreo taste. - 16 oz dark chocolate, chopped
Dark chocolate serves as the main ingredient for coating the bark. It melts smoothly and imparts a deep, rich sweetness that balances perfectly with the cookies. Using high-quality chocolate will enhance the flavor significantly. - 8 oz white chocolate, chopped
White chocolate adds a creamy contrast to the dark chocolate, both visually and taste-wise. Drizzling it on top not only improves the aesthetic appeal but also introduces an additional layer of sweetness. - 1/2 cup sprinkles (optional)
Sprinkles add a fun, colorful touch to the bark and can elevate its festive aspects, making it perfect for celebrations. They also contribute a slight crunch and visual flair. - 1/4 cup sea salt (optional)
A sprinkle of sea salt enhances the overall flavor profile by balancing the sweetness of the chocolates and Oreos. This savory touch brings a delightful contrast and depth to the gourmet bark.
Directions & Preparation
Step 1: Prepare a baking sheet with parchment paper.
Lining a baking sheet with parchment paper prevents the bark from sticking and allows for easy lifting once it’s set. This step ensures a clean release and keeps your presentation intact, which is crucial for a gourmet treat.
Step 2: Melt the dark chocolate in a double boiler or microwave.
Melting the dark chocolate correctly is essential for achieving a smooth coating. If using a microwave, heat in short bursts to avoid overheating; chocolate scorches easily. Stir frequently until fully melted for a glossy finish.
Step 3: Pour the melted dark chocolate onto the prepared baking sheet and spread it evenly.
Spreading the melted chocolate to a uniform thickness ensures even setting and makes for a neat presentation. A spatula can help create an even surface, enabling better distribution of the Oreo pieces when added.
Step 4: Sprinkle the crushed Oreos over the melted dark chocolate.
Distributing the Oreos evenly while the chocolate is still warm allows them to partially embed into the bark, enhancing flavor and texture integration. Press them gently so they adhere well, ensuring every piece has that beloved Oreo crunch.
Step 5: Melt the white chocolate and drizzle it over the Oreo layer.
Drizzling white chocolate not only enhances the visual appeal but also creates a delicious contrast in flavor. Use a piping bag or a fork for a more controlled drizzle, allowing for artistic expression.
Step 6: Add sprinkles or sea salt as desired before the chocolate sets.
Adding sprinkles or sea salt at this stage allows them to stick to the surface of your bark. Timing is important—if you wait too long, the chocolate may harden and your toppings won't adhere properly.
Step 7: Place the baking sheet in the refrigerator to set for about 1 hour.
Chilling the bark solidifies the chocolate, making it easier to break into pieces later. Patience during this step is key; rushing it can result in uneven setting and messy edges when cutting.
Step 8: Once set, break the bark into pieces and serve.
The breaking process allows for rustic, uniquely shaped pieces that adds to the charm of the gourmet bark. Using your hands rather than a knife gives each piece individuality, enhancing its homemade appeal.

Elevating Oreo Bark with Flavor Enhancements
While the classic Oreo bark is delightful on its own, adding flavor enhancers can elevate it even further. Consider incorporating flavored extracts like peppermint, orange, or almond into the melted chocolate. Alternatively, infuse the dark chocolate with a hint of espresso powder for a coffee dimension that complements the sweetness beautifully.
Customizing Your Bark with Toppings
Experimenting with toppings opens a world of possibilities for your gourmet Oreo bark. Chopped nuts like pistachios or almonds contribute crunch and flavor, while drizzles of caramel or peanut butter can add richness. Fresh berries or shredded coconut can offer unexpected freshness and contrast, creating a bark that’s uniquely yours.
Pairing and Presentation Ideas
Presentation can elevate your Oreo bark from simple to stunning. Cut it into artistic shapes and serve on a stylish platter or package pieces in clear bags tied with ribbons for a thoughtful gift. Pair your bark with a hot beverage like coffee or hot chocolate, making it a delightful snack suitable for cozy gatherings.
FAQs
What kind of dark chocolate should I use?
Choose high-quality dark chocolate with at least 60% cacao to balance sweetness and bitterness. Avoid chocolate chips, as they contain stabilizers that can affect melting.
Can I use milk chocolate instead of dark chocolate?
Yes, milk chocolate can be used for a sweeter flavor, but the overall taste will change. Adjust the amount of sugar or toppings accordingly.
What if my chocolate is too thick when melting?
If your chocolate thickens, it may have overheated. Stir in a small amount of coconut oil or shortening to smooth it back out without compromising flavor.
How can I make the oreo bark more visually appealing?
Consider layering white and dark chocolate or using multiple types of Oreos. A mix of colors can create a more striking appearance.
What do I do if the Oreos aren't sticking to the chocolate?
If the cookies aren't sticking, make sure you're using warm melted chocolate. Try pressing them lightly or melting additional chocolate for enhanced adhesion.
How can I scale this recipe for larger batches?
To scale up, simply double or triple the quantities while using a larger baking sheet. Ensure your chocolate still melts evenly to maintain quality.
Conclusion
Creating gourmet Oreo bark is a rewarding and delicious endeavor that encourages creativity in the kitchen. With easy-to-follow steps and endless customization options, it's a dessert that can be tailored to fit any occasion or taste preference.
So gather your ingredients, unleash your culinary imagination, and enjoy the delightful process of making this gourmet treat. Whether for yourself or to share, every bite of Oreo bark promises to bring a smile.
Recipe Card
Decadent Gourmet Oreo Bark for Home Entertaining
Ingredients
Method
- Prepare a baking sheet with parchment paper
- Melt the dark chocolate
- Mix in vanilla extract
- Fold in the crushed Oreos
- Spread the mixture onto the baking sheet
- Melt the white chocolate and drizzle
- Sprinkle on decorations
- Chill until set
- Break into pieces and serve
Tried this recipe?
Let us know how it was!Notes
Additional serving suggestions: pair with a crisp salad, garlic bread, or roasted seasonal vegetables for balance.
For make-ahead, prep components separately and assemble just before heating to preserve texture.
Taste and adjust with acid (lemon/vinegar) and salt right at the end to wake up flavors.